
Once you have your Dynamics 365 for Marketing trial set up then the next thing you will want to do is to start creating some segments of contacts to work with.
In this blog we will take a look at how to create a segment in Dynamics 365 for Marketing as well as some of the options and “current” limitations along the way.
What is a segment?
A segment is a collection of contacts that are used;
- For customer journey targets.
- For subscription lists.
Segments can be;
- Dynamic: Based on criteria.
- Static: Contacts are manually added or removed. This is useful when the criteria for inclusion might be subjective.
- Compound: A joining of one or more segments to include or exclude people.
It is similar to Dynamics 365 Marketing lists but the difference is that Segments are synced to Azure, which will allow for complex data processing to take place without affecting your day to day Dynamics activities.
Scenario
In our scenario, we run a factory that makes cheesecakes and we send samples out to contacts at various retail outlets as a way to entice them to buy from us. We need to produce a segment of contacts that work in a certain geographic area that have had a sample sent to them in the last 30 days. We would additionally like to filter that down to a specific type of cheesecake flavour but unfortunately that is where we are currently hitting a limitation of the preview product (see below).
For our scenario we have created and populated two new fields on the contact entity;
- Last Sample Sent – New_lastsampledate (Last Sample Date): Date field
- Sample Sent – New_Samplesent (Sample Sent) : Multi-Select option Set
Steps
1. Go to segments on the navigation pane on the left of the window.
2. Click on New.
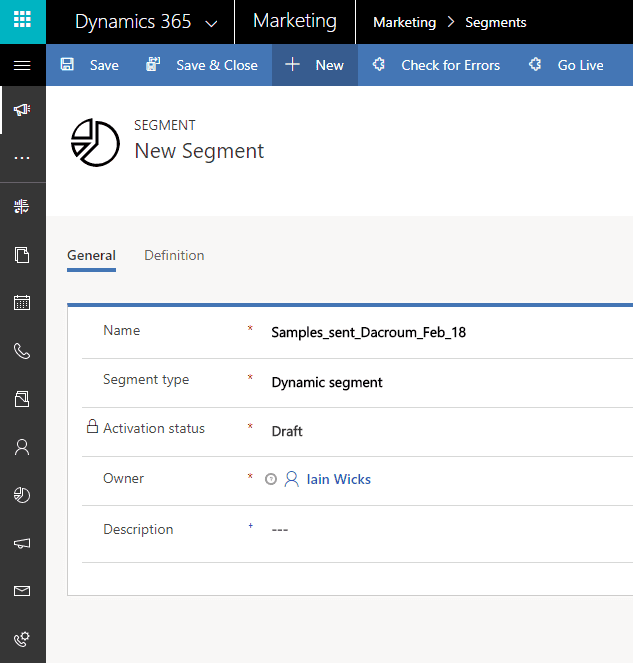
3. Name the segment. Numbers, letters and underscores are allowed.
- Select Dynamic Segment.
- Optionally write a description for your segment
4. Next click on the Definition tab and define your criteria
- You will see three further tabs when you click on definition this is because Microsoft have provided three ways to design a query.

Designer: This is the easiest one to use to start with. You select fields and operators to build an expression. Although the use of this tab can become pretty advanced once you start to use the explore option and the adding of groups. For the purpose of this simple demonstration we will use the Designer tab to create a simple query.
Flow: This is a more visual way to create the same query. Although all the features on the Flow tab also appear to be available on the Designer tab.
Query: If you are more inclined to write queries rather than use a visual editor then you can use the query tab. We think this Query tab may offer a good alternative to performing some more complex searching that isn’t available in the Designer view. There is an explanation of the syntax here
https://docs.microsoft.com/en-us/dynamics365/customer-engagement/customer-insights/ref/segquerylang
On the Designer, tab we can see that the first drop down is pre-selected as contact. Unfortunately the naming conventions are not the most user friendly. Entities are identified by a prefix and fields are only displayed by their schema name and not by the more user-friendly label. To be frank, asking marketing people to pick fields by a schema name is not the best idea Microsoft ever had. We are hoping this might be addressed before the final release.
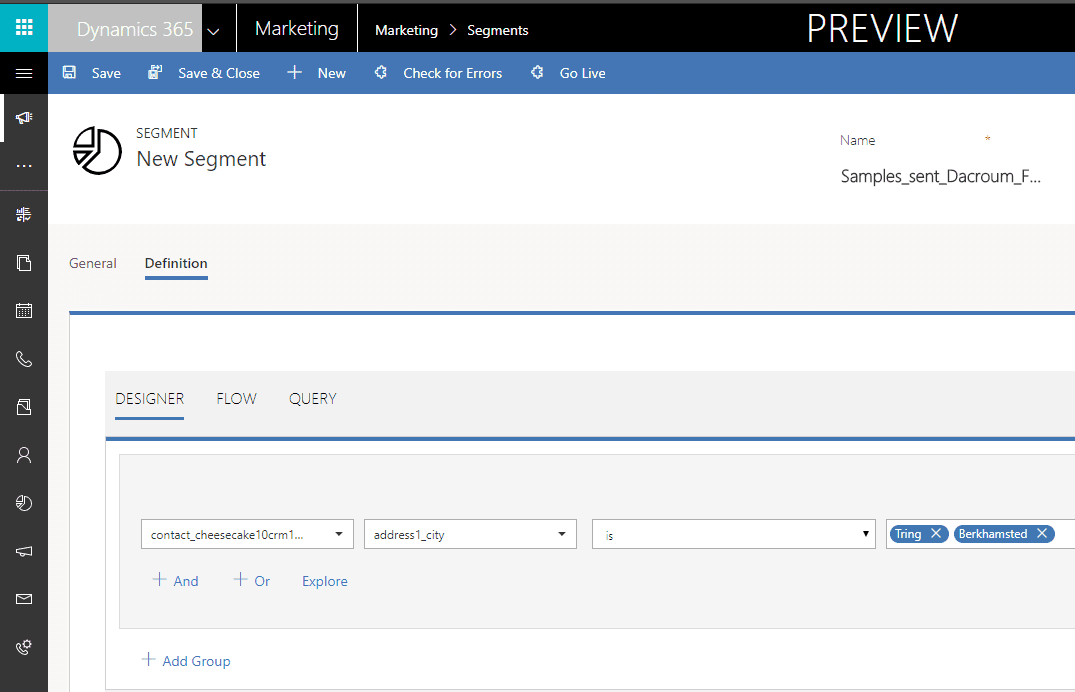
You can see in the screen shot above that we have added the first clause of our expression (we are looking for contacts in Tring or Berkhamsted). Adding values for a text field is easy; just type the value you require and hit enter, then do the same again to add another one.
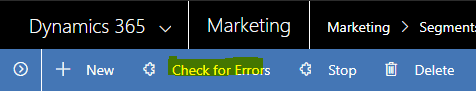
Once you have added the criteria for your query you can press the “Check for Errors” button to parse the query.
We also wanted to select those contacts to whom a sample had been sent in the past 30 days. We chose the before or after “current moment” tool at the end of the date field (to the right of the date picker) and selected 30 days before today.
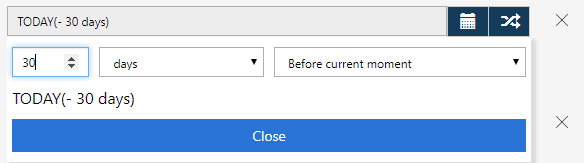
Unfortunately, this produced an error on the trial version when the “check for errors” button was pressed.
“The segment query isn’t valid, or the target profile doesn’t match.”
We were unable to make this tool work in the trial version, so we used the date picker to continue as shown below.
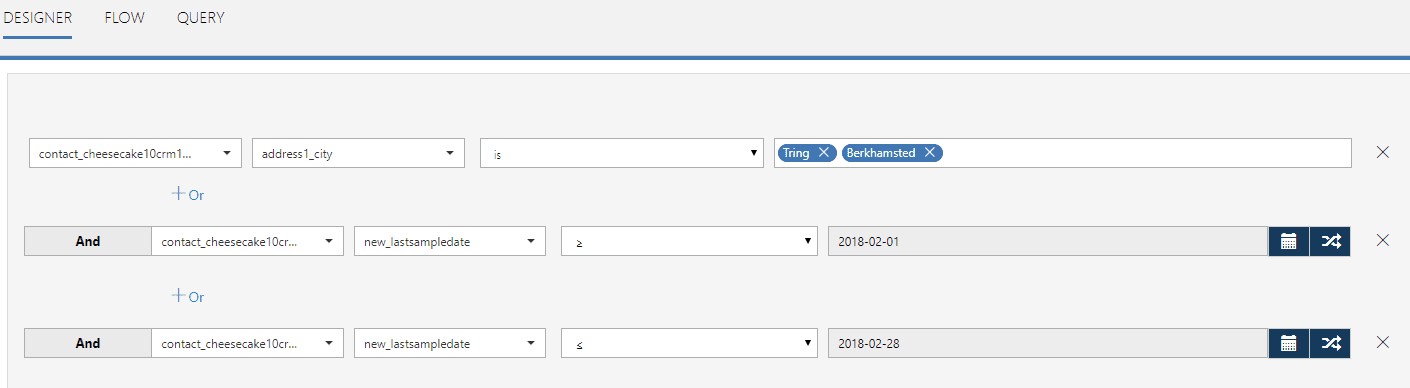
Another issue we found was that we were also unable to find a way to select option set values in the visual designer. We were only able to add via the query tool.

You can press the get estimated segment size button to get a quick count of the contacts that match your criteria. One thing to note here is that based on the criteria selected we got an estimate of 24 but when we did the same search using advanced find the number was 15. Once the segment went live, however, the count was correct and we ended up with 15 contacts in the segment.
On the command bar you can press “Save” to save your query then when ready click “Go Live” to activate the segment.

After a short wait refresh the view and you should see that the sector is either provisioning or is ready. Click the Members tab to view the member records.
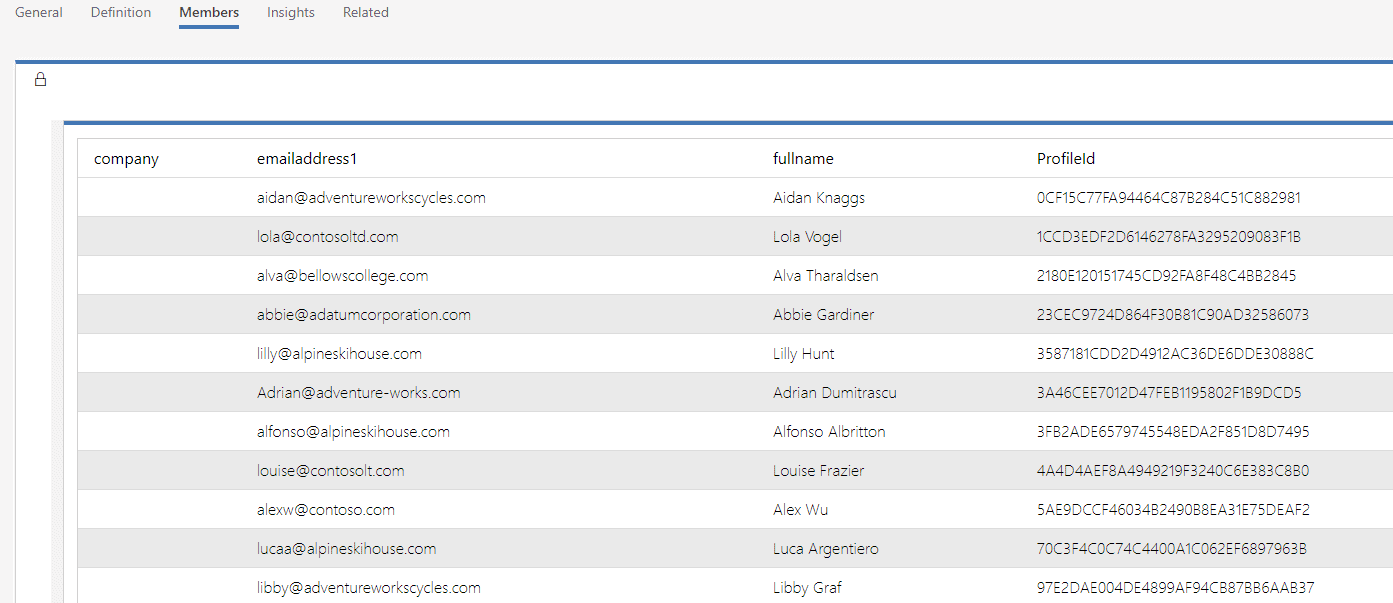
The members tab in itself doesn’t seem to be very useful as there is no sorting or filtering on the columns (except the profile ID column).
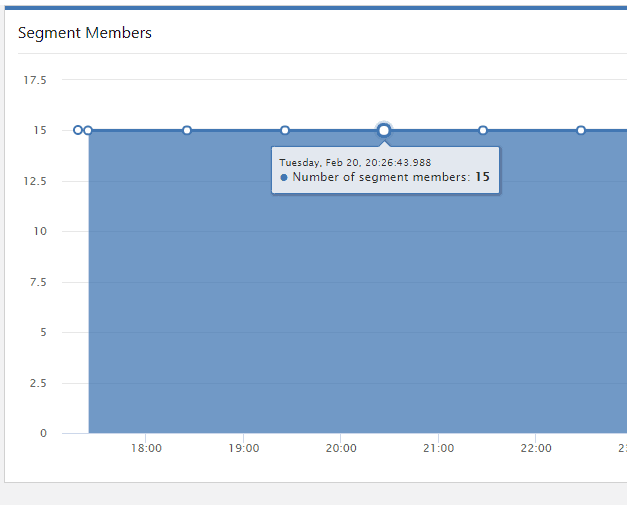
The Insights tab shows a current count of how many contacts are in the segment.
The segment should now be available to the email service and for use in customer journeys.
Summary
At the time of writing, the product is in a public preview state. We can see a lot of potential in the segments tool but it seems to be early days yet. The design/definition tool has some great features that we plan to blog about in future posts. It is important to accept that this is a brand new product and there are bound to be gaps. We believe the first release is due sometime in April 2018. Watch this space for updates as soon as we hear further news from Microsoft.
We would also like to draw your attention to a great blog post by Steve Mordue (Microsoft Dynamics MVP) on the new Dynamics 365 for Marketing product.
Rocket CRM is a Microsoft Partner providing Dynamics 365 services and licensing to businesses predominantly in the UK.
Contact us if you have need some Dynamics 365 assistance