During the current pandemic, it’s more important than ever to understand what your customers are asking for. In the past, reporting on unstructured free-text data for SMEs has always been tricky. Users tend to enter information slightly differently and this causes issues when trying to create a standardised reporting. More often than not, someone has needed to manually try to interpret the data and then present this back to the organisation on a Power Point slide. There are a number of issues with this process.
- It’s open to human error, as its a manual process.
- Generating this type of report is very time consuming; often taking days or weeks to produce.
- When reported, the data is already out of date.
What I’m going to show you below is how to ‘filter out the noise’ on free-text fields to help you produce a report showing the key phrases and topics that your customers are talking about. In my example, I’m running this on the case entity in Microsoft Dynamics 365, but it can be run on any entity you want such as Accounts, Contacts, Opportunities and Leads.
My plan in this two part series is to take you through the steps needed for reporting on unstructured free-text data. We will take the data in the free-text description field on the case entity and extract the key phrases using Azure Text Analytics. In part 2 of this blog, I’ll show you how to use Power BI to display the key phrases as a word cloud report.
As a disclaimer, what I’m going to show you can be done in a number of ways in Power Apps or Microsoft Dynamics 365. The way I’m showing you, is how to utilise this functionality with minimal additional cost to an SME as I plan to use the free tier for Azure Text Analytics.
Setup in Azure Portal
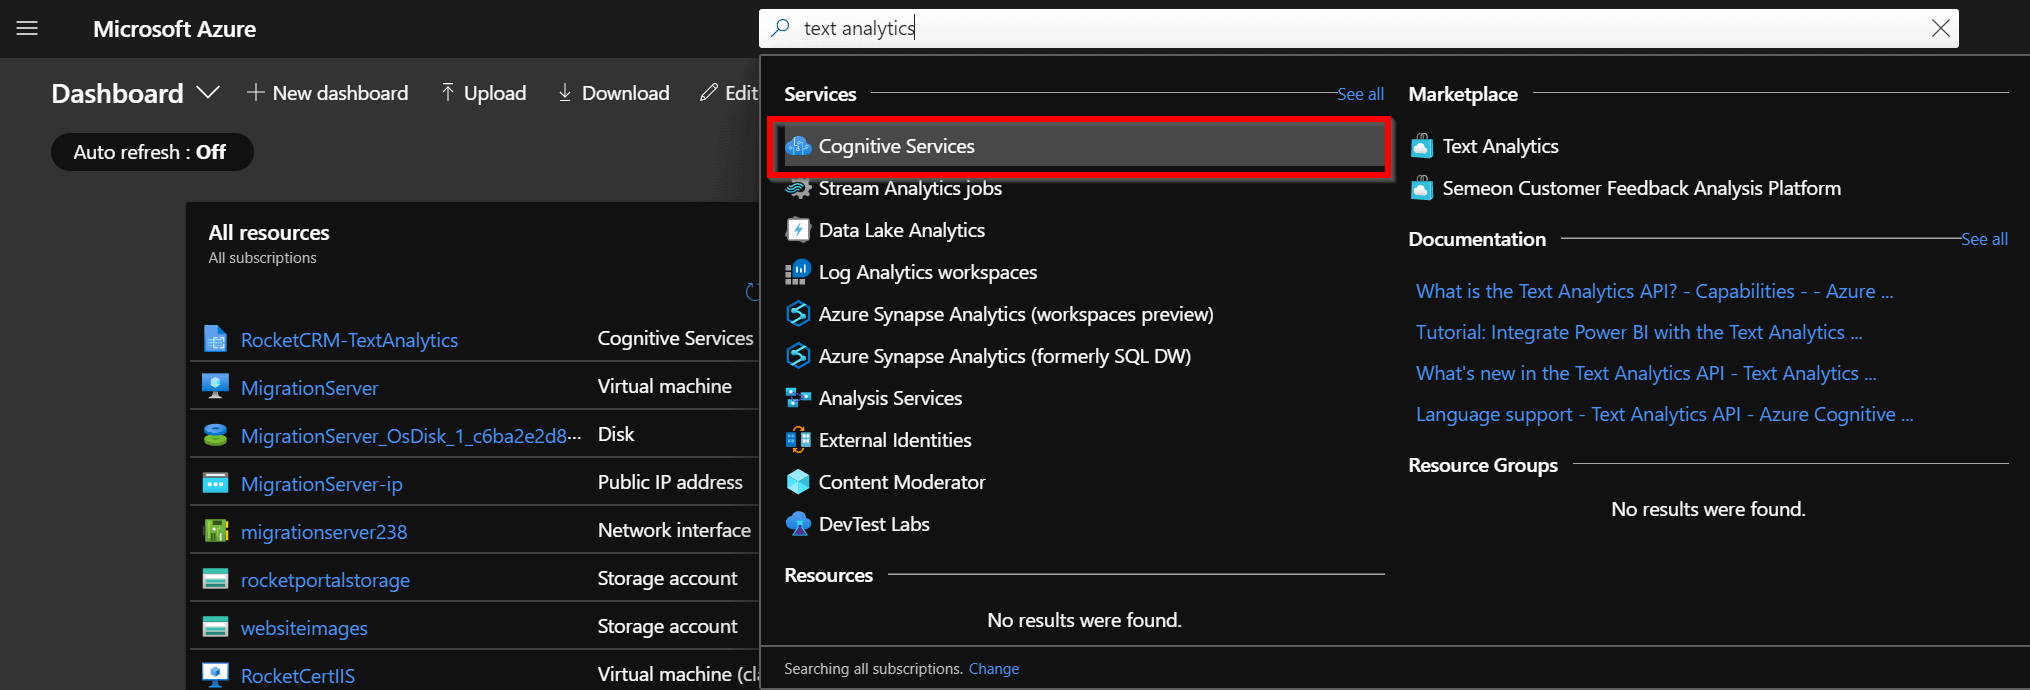
Firstly, we need to provision the Text Analytics service in Azure. To do this, go to the Azure portal and in the search bar at the top, search for text analytics and click on Cognitive Services.
When that loads, click on Add at the top left and you’ll be taken to a market place. Search for Text Analytics, click on Text Analytics and click Create.

You’ll be prompted to enter a name, subscription, location, pricing tier and resource group. You can choose the appropriate values you need, but for this example, I’m using the free pricing tier which allows me to make 5,000 calls to this service every 30 days. This is more than sufficient for my use case and for most SME’s.

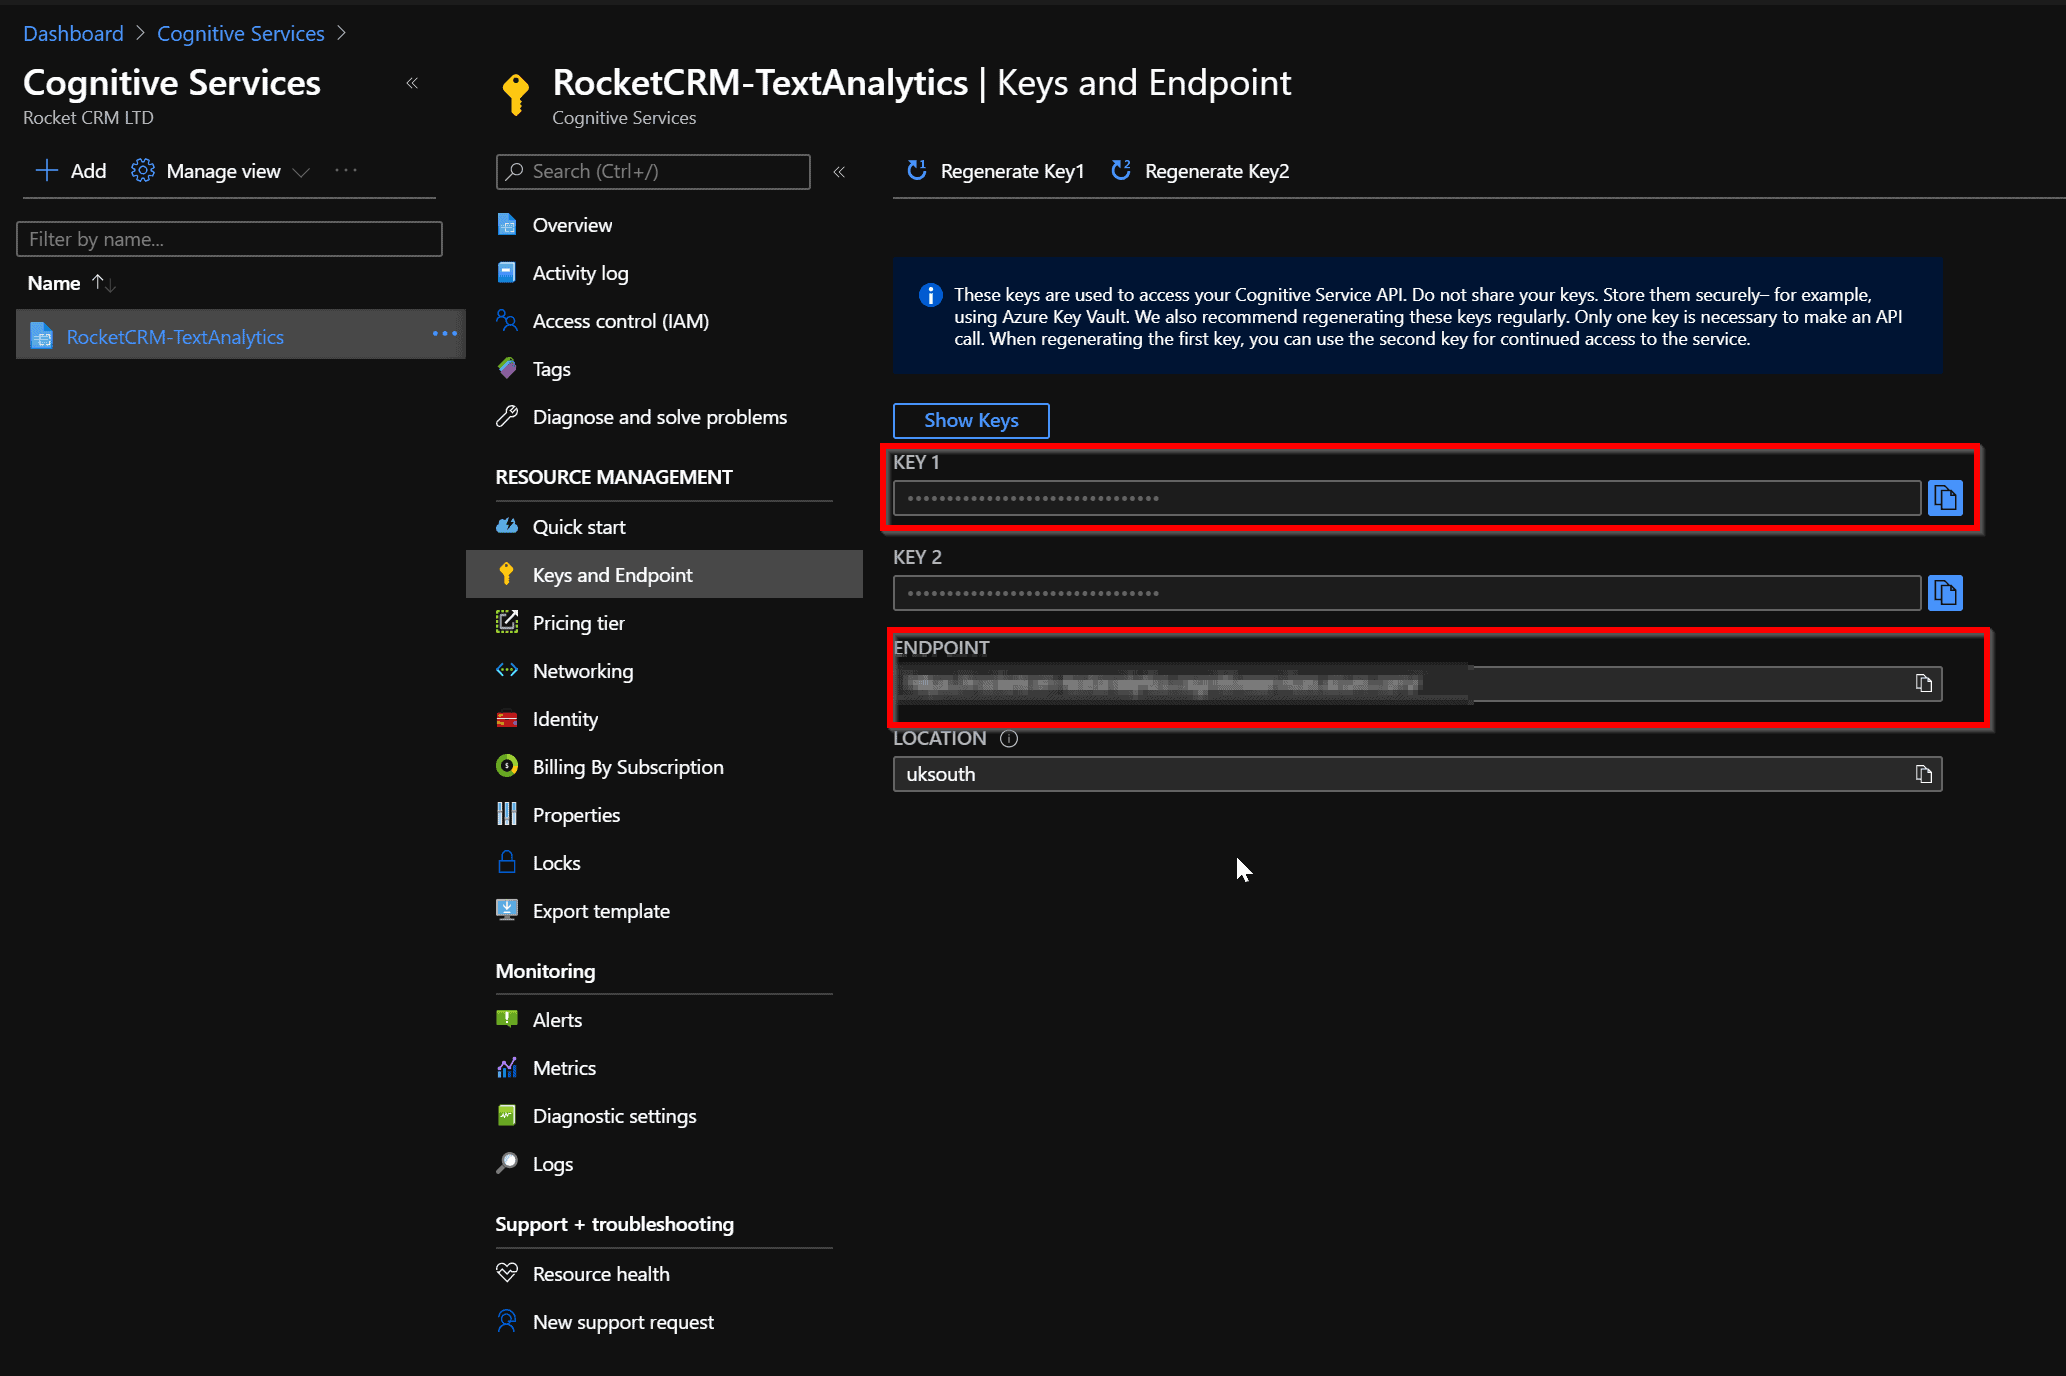
Once saved and provisioned, you should be able to open the Cognitive Services service and click on Keys and Endpoint to get the two pieces of information we need. You need to grab one of the Keys presented and the endpoint of the service.
That’s all we need to do in Azure. Next, we’ll move on to the setup in Power Apps & Power Automate.
Create the Field in Dynamics 365 or Power Apps
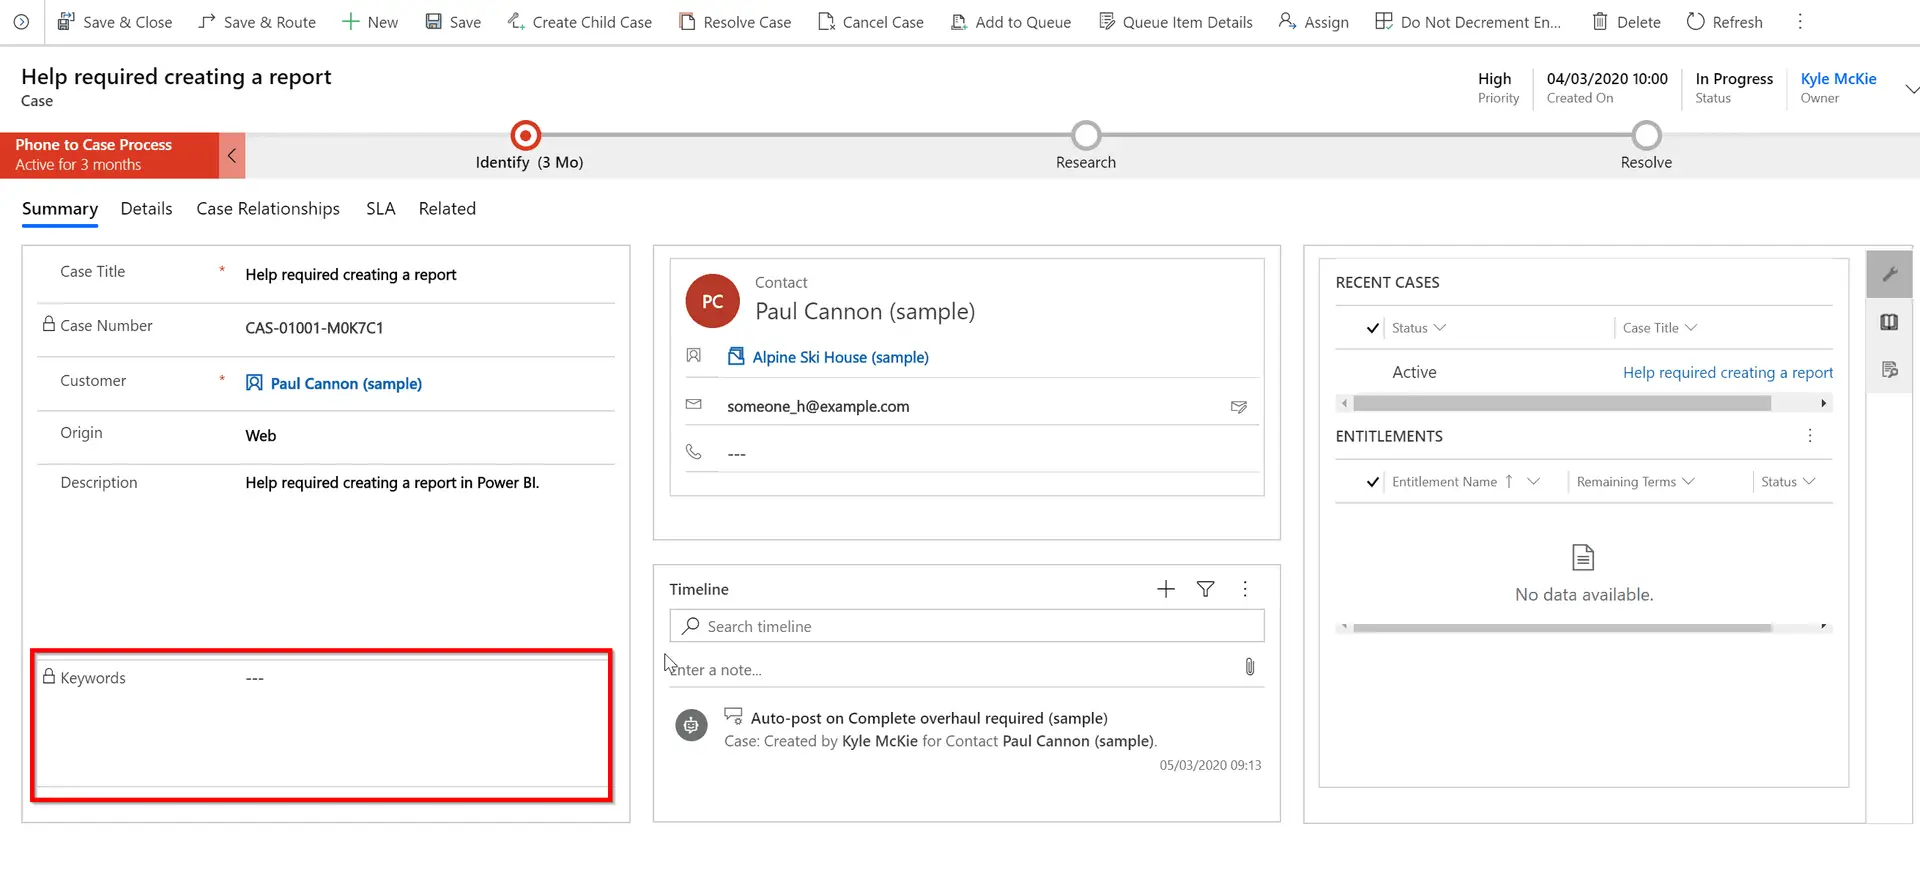
I won’t go through the steps on how to create a field in Power Apps or Dynamics 365 but you need a field to store the result. In the screenshot below, I’ve created a memo field called Keywords, made it read only and added it to the form under the Description field.
Setup Power Automate
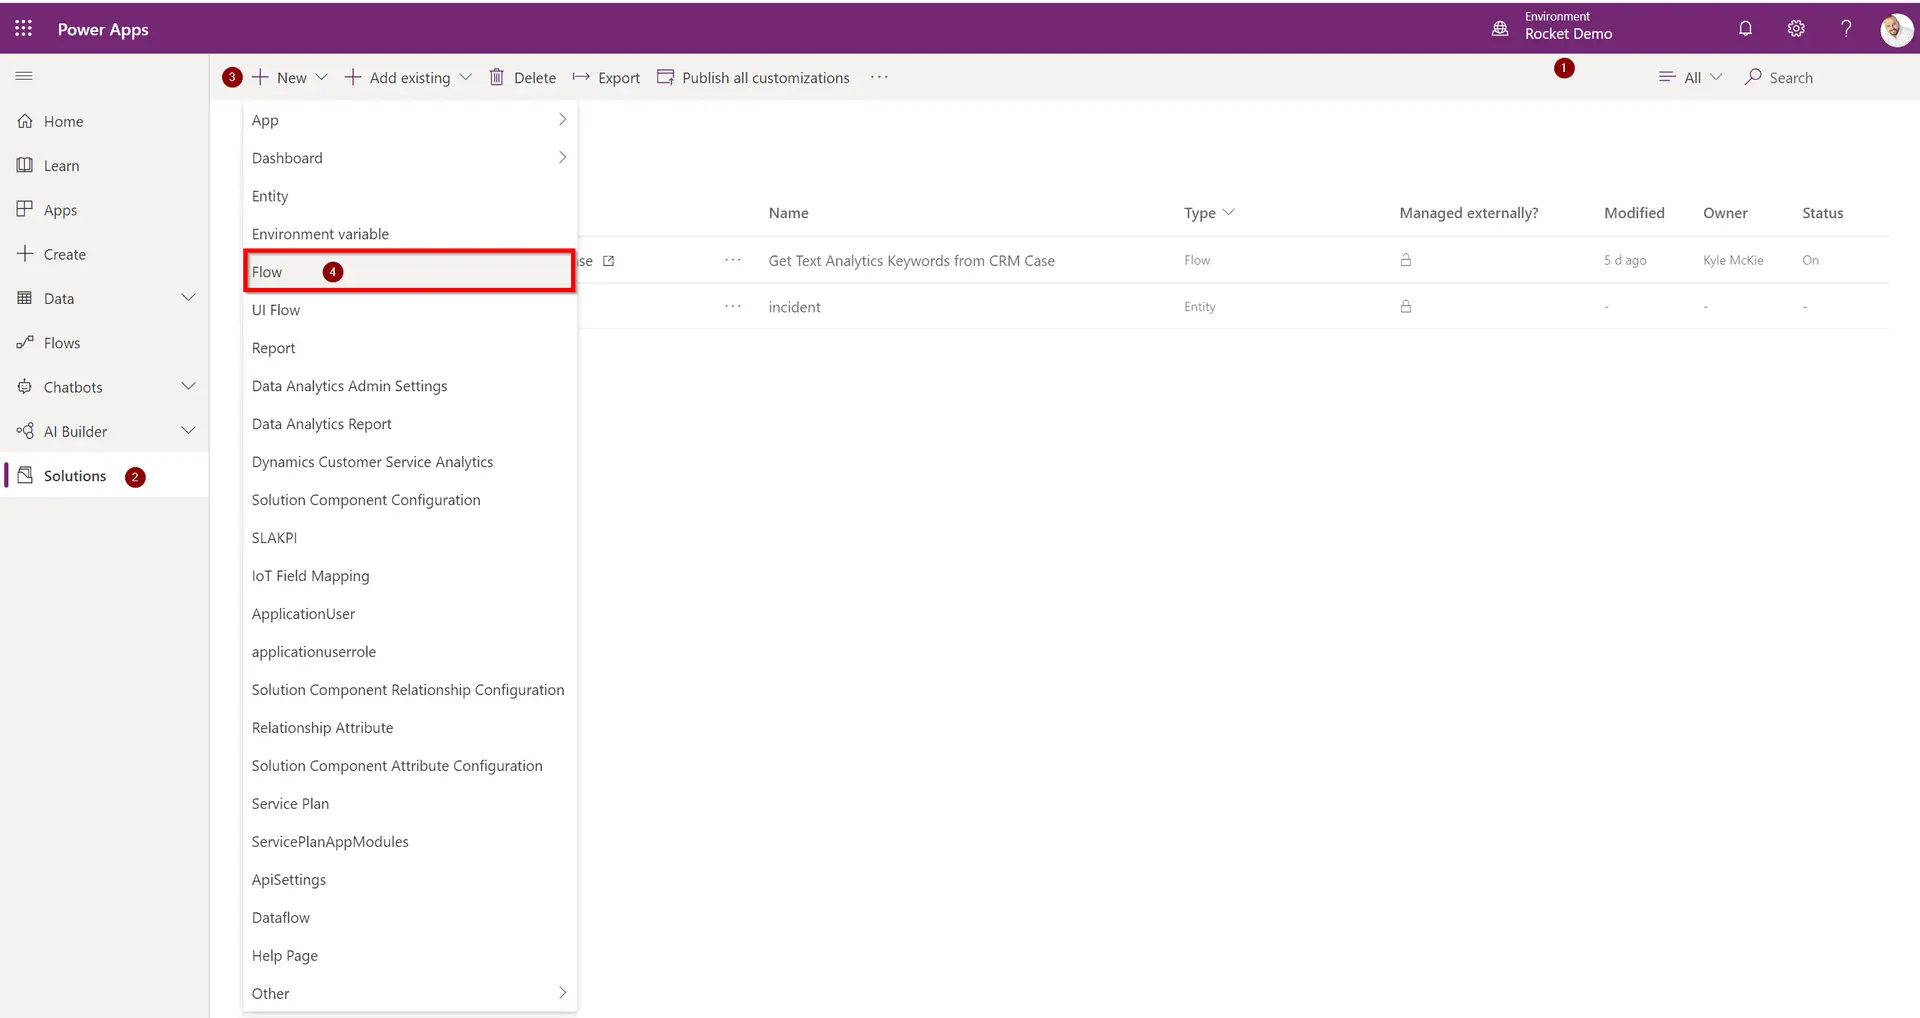
The penultimate piece of the puzzle is to setup a Flow in Power Automate. We will trigger this Flow on creation of a case and on change of the description field. We will then pass the text to Azure Text Analytics and write back the results into the Keywords field we created. I’ve created a solution first by going to the Power Apps Maker portal. Inside the solution, click on New –> Flow. You will be taken to the Flow builder where we can build the logic we need.
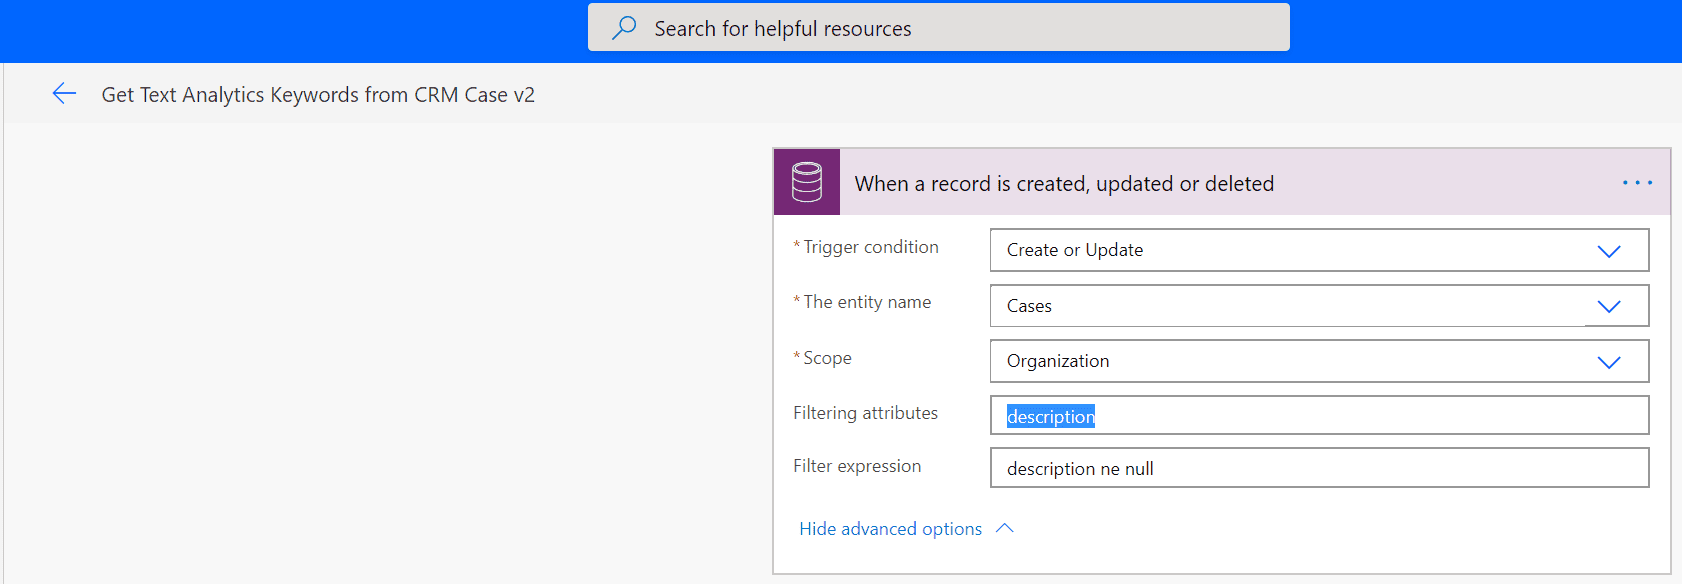
Select Common Data Service (Current Environment) as the connector (It’s very important that you select this connector and not the Common Data service one). Select When a record is created, updated or deleted as the trigger.
Set the values as below. I’m running my Flow on Cases, you would select the entity you want to trigger the Flow on appropriately. I’m also filtering my flow on description. This means that the Flow will only execute when the description field is updated and not on every field on the entity. I’m also filtering the Flow to run only when the description field contains data.
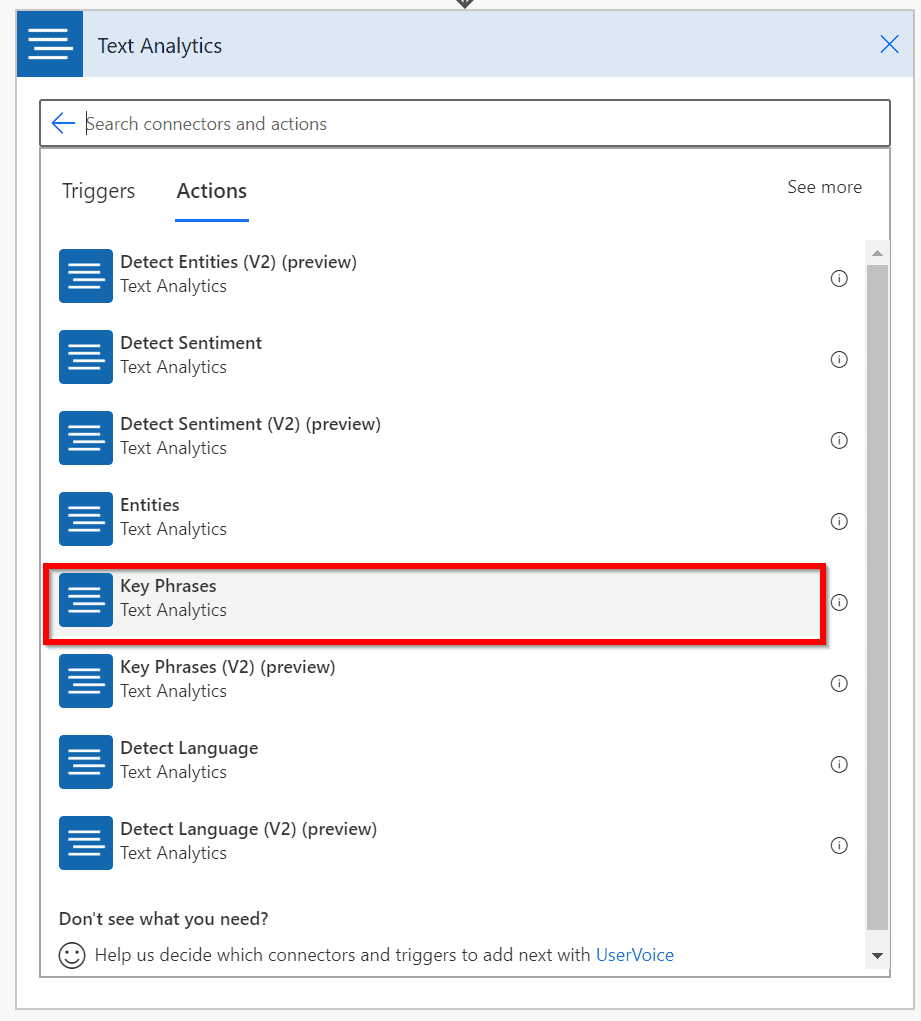
Add another action and search for Text Analytics and then select the Key Phrases Action. If this is the first time you are using this connector, you’ll be prompted for a connection name, account key and site URL. Enter a friendly name in the Connection Name field, the Key we copied from Azure in the Account Key field and the Endpoint URL you took from Azure into the Site URL field.
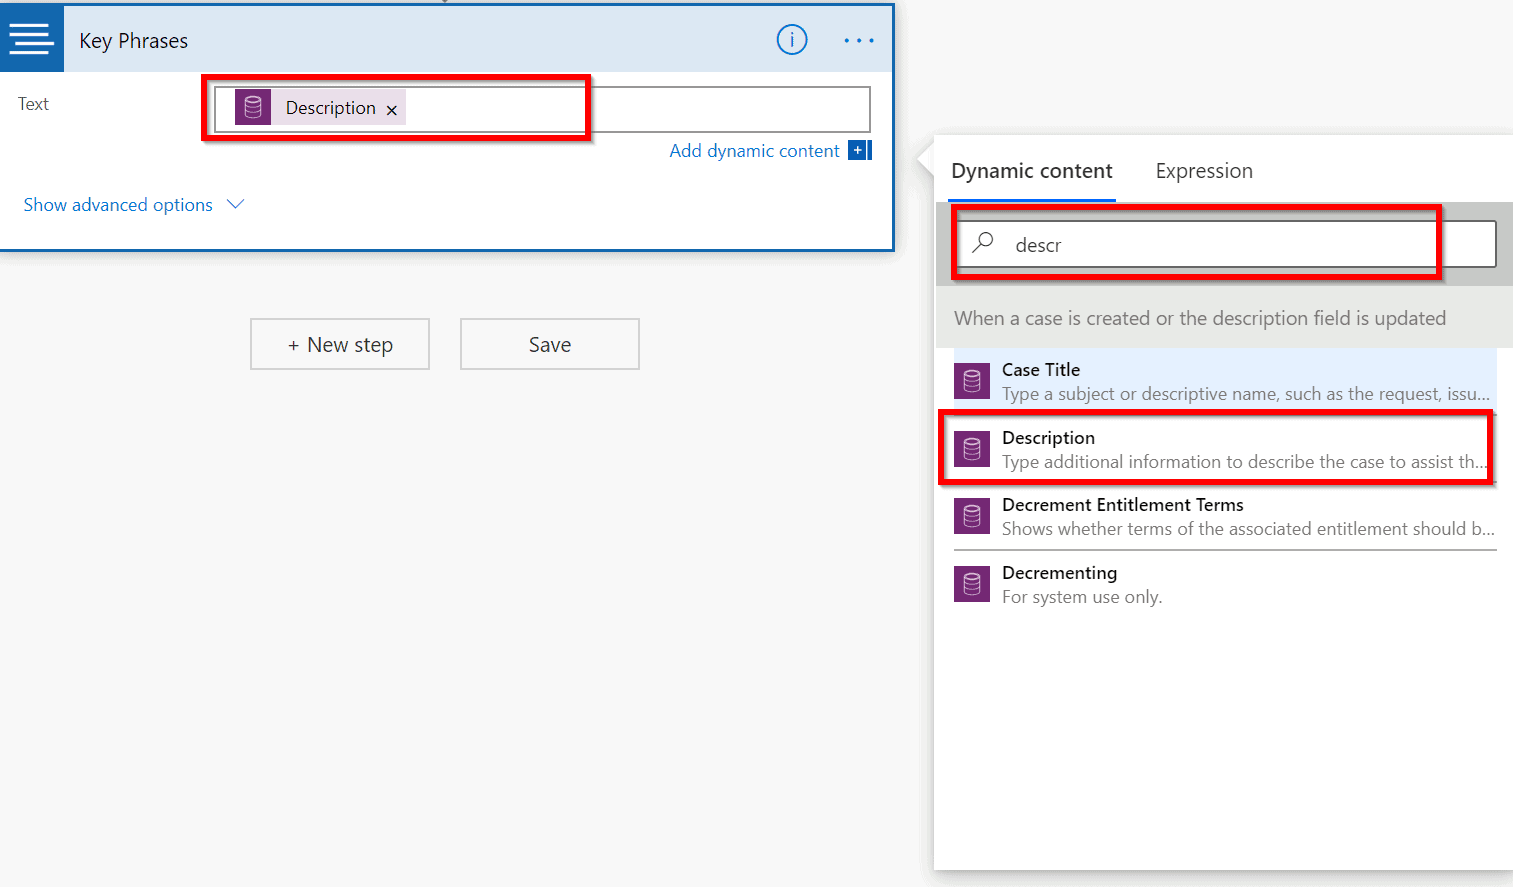
We need to tell Power Automate which field we want to get the text from. To do this, click in the Text field and in the Dynamic Content box that appears, search for description and click on it. This will add the Description field to the Text field in the Key Phrases action.
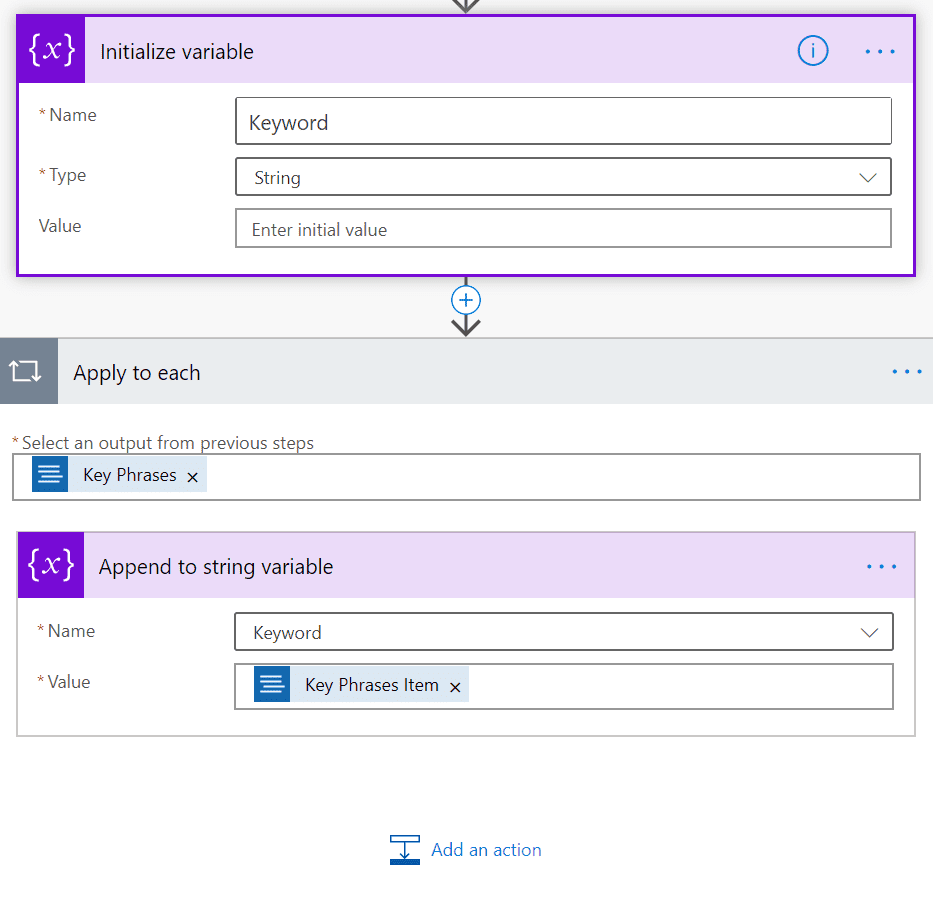
In the next part, we initialise a variable called Keyword. The reason for this is Text Analytics returns the data in an array and we want to write this into one field. We then Add an Append to String variable and add Key Phrase Item to the value field which automatically sets up an Apply to each step. Add a comma in front of the Key Phrase Item field in the Value field.
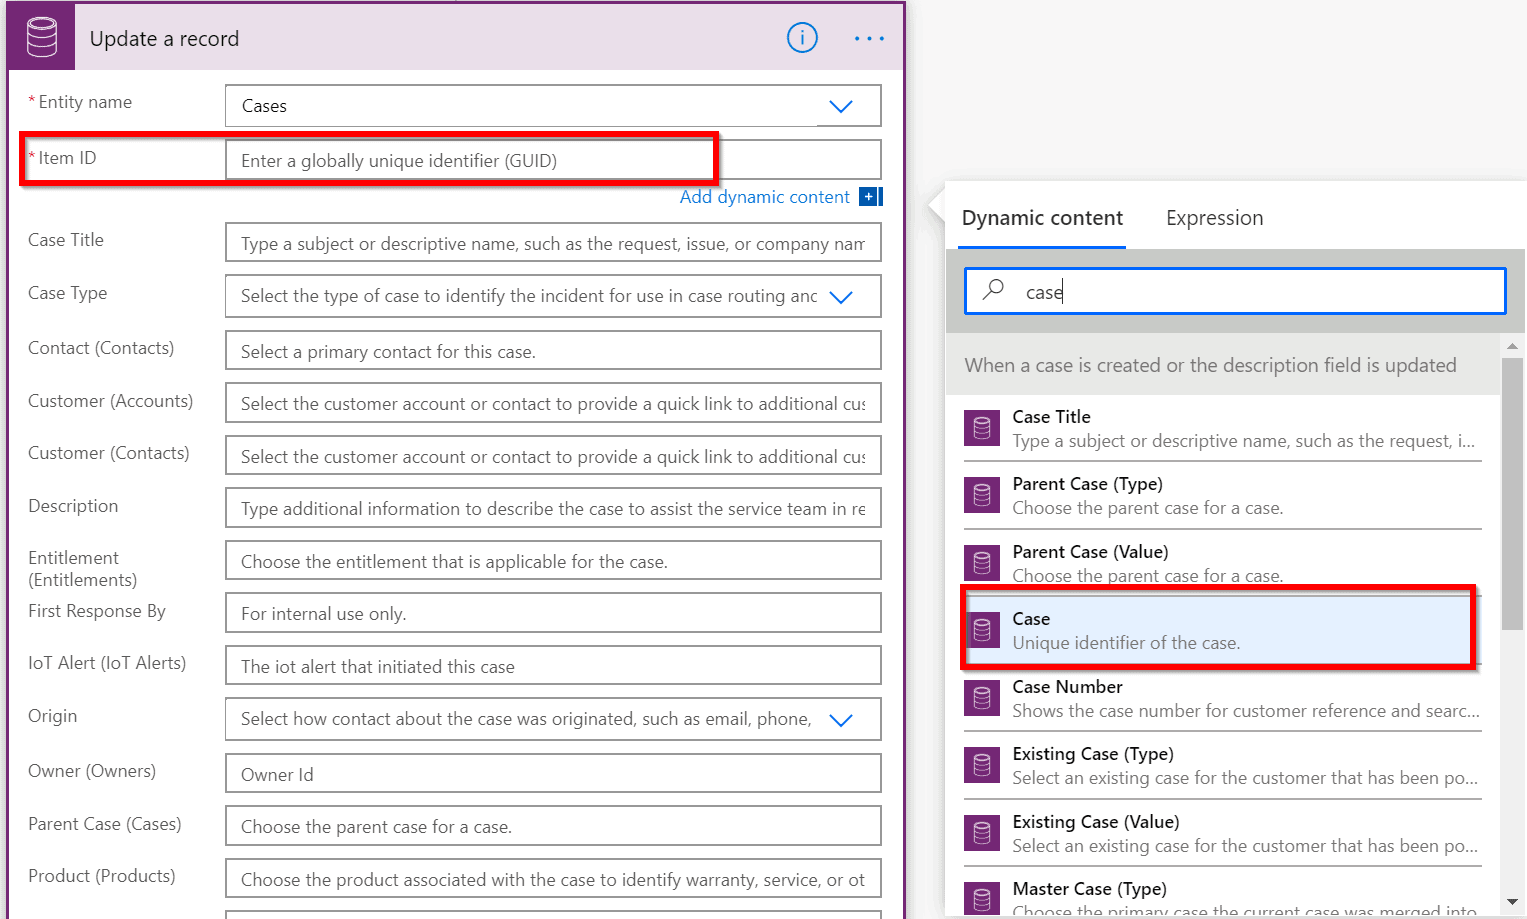
The final step is to update the case record with the new value. Choose Common Data Service (Current Environment) and select Update a record action. In the Item ID field, select case as the field we want to use as the ID.
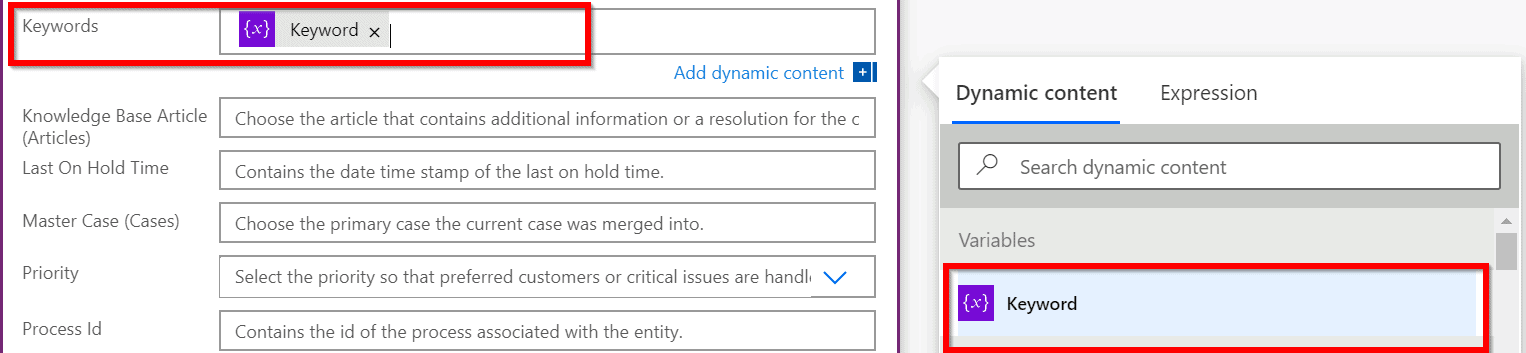
The final bit is to map the Keyword Variable to the Keywords field.
Once this is complete, you’re ready to test!
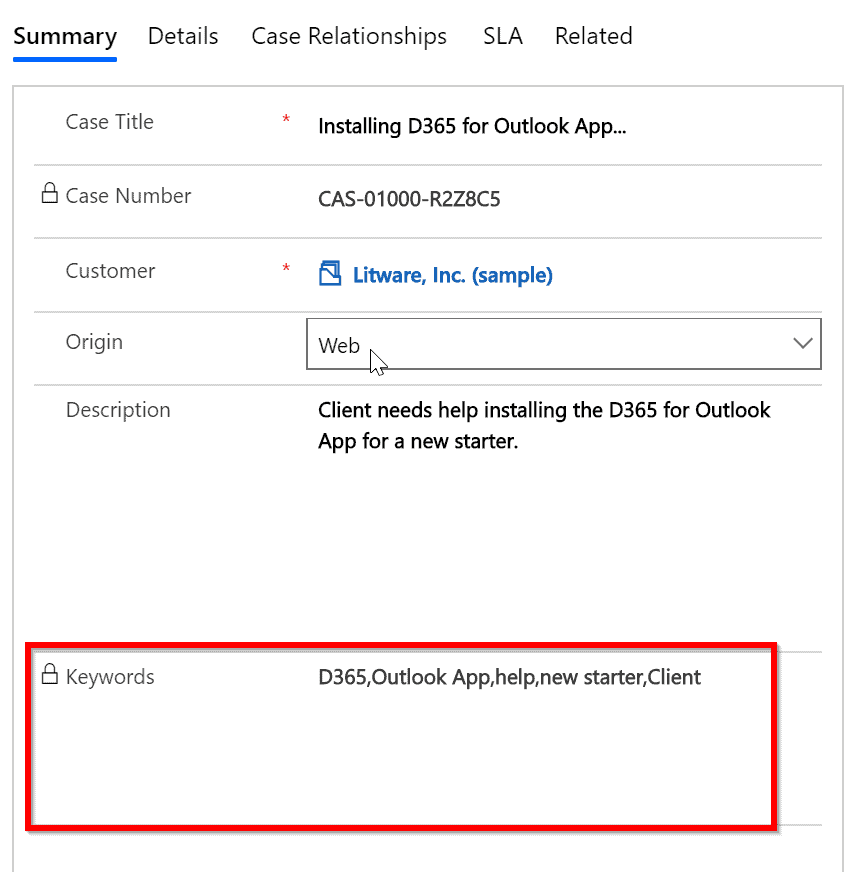
In Power App or Dynamics 365, Add a new case and enter an appropriate description and hit save. Within 20 seconds or so, refresh the page and you should see the Keywords field populated like the below!
In how to report on free-text data in Dynamics 365 Part 2, I’ll show you how to display this data in a Word Cloud within Power BI, which is a nice visual way of reporting on unstructured free-text data.
In you want to setup this functionality and need some assistance, contact us at Rocket CRM and we’d love to discuss your requirement and advise you of the best approach to implementing this functionality.
ABOUT ROCKET CRM
Rocket CRM is a Microsoft Dynamics 365, and a platinum Click accredited partner, helping small to medium-sized businesses and charities harness the power of scalable CRM technology. Our mission is to make powerful CRM software simple with custom-built, user-focused solutions.
Website: rocketcrm.co.uk
Podcast: RocketPod
Social: LinkedIn