Event Management using Dynamics 365
Microsoft Dynamics 365 for Marketing is Microsoft’s business application designed to meet the marketing requirements of a company or organisation in the small to medium-sized enterprise sector. It was launched earlier in 2018 and is shaping up to be a great fit, alongside other Microsoft Dynamics applications such as Dynamics 365 for Customer Engagement (which is the application used for sales and customer service).
There are many components that make up this application, including marketing emails, customer journeys, lead scoring, surveys, portals, landing pages and much more. In this blog post and over the course of the next few posts we will look at creating events in Dynamics 365 for Marketing, exploring its smart capabilities. I have to admit I was quite taken aback at how comprehensive the event functionality appears to be. Especially when you consider the newness of the product to the marketplace.
Events can be complex to arrange, carry out and follow up on. The Microsoft Dynamics 365 event management feature helps event managers and marketers plan, budget and publish events. The functionality also allows management of teams, venues, hotel accommodation, sessions, speakers, sponsors and, of course, registrations and attendees.
Events
The Event entity itself is very much like a placeholder for everything linked to the event. Once you have set up the initial event you can then start to add all the other event components you need for your event. In this post, we will set up the initial event and view it in the event portal.
In the events area of Microsoft Dynamics 365 for marketing navigate to Events and click New in the command bar.
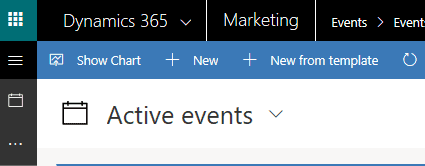
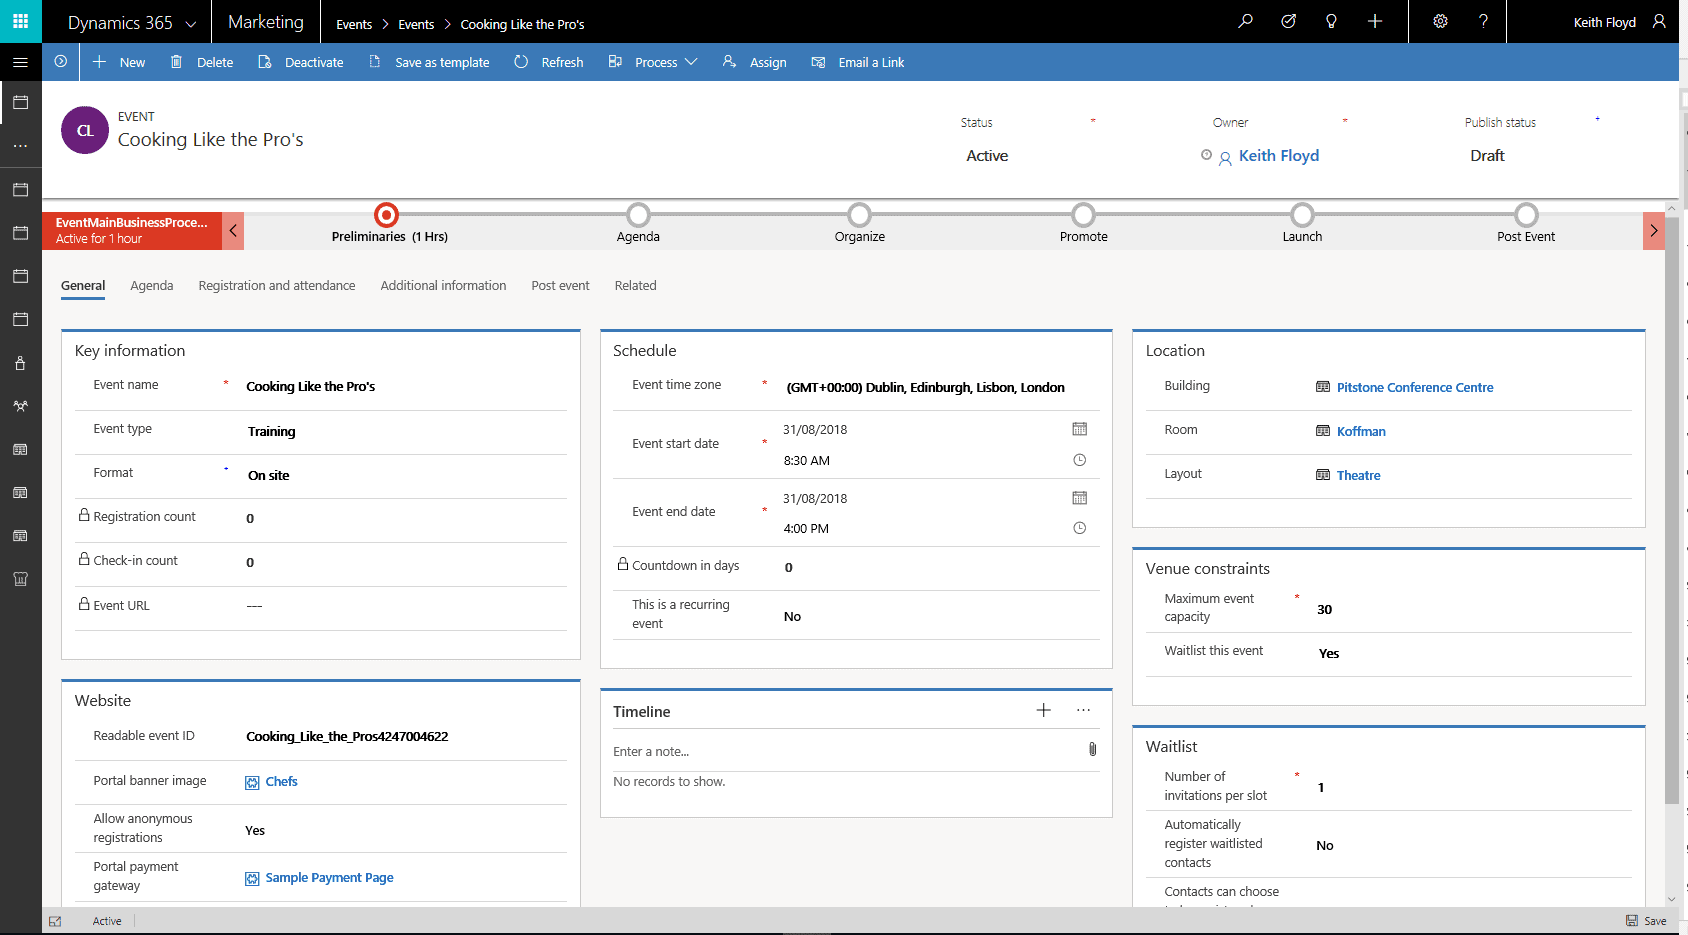
When creating an event, you can add the basic details that you need to get started and then gradually piece together the remaining items as you put your event together. The event record is the place that holds everything together. Note from the image(above) that you can also set up an event from a template.
After clicking New, I started adding the basic details of my event…
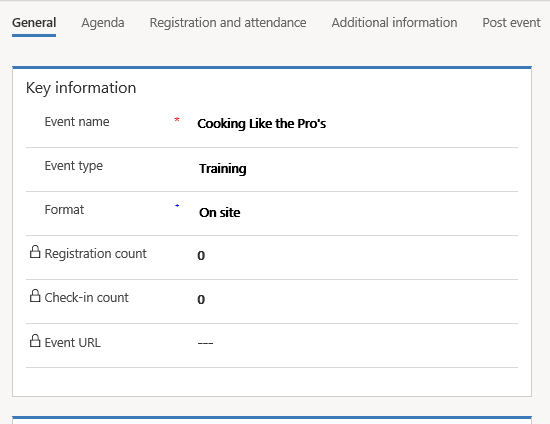
A few items worth pointing out are;
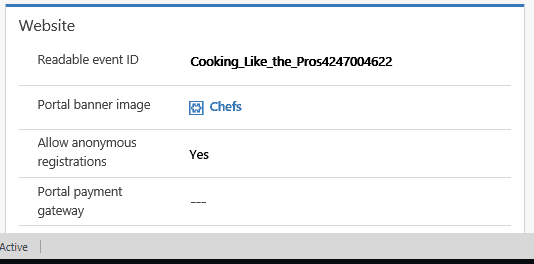
Website Section (see image below)
The Readable Event ID cannot have spaces and is used for the “Slug” part of your event’s URL on the event portal. (i.e. it is attached to the end of your eventual portal URL in order for someone to navigate to your event on-line)
The Portable banner image can be configured with your own images. Click into the field and instead of selecting a pre-configured webfile, click New:
- Name: Type a name, for example: “chefs”. Then edit the following settings as below…
- Website: Event Portal
- Parent Page: Home
- Partial Url: (type a name without special characters or spaces)
- Click Save
- Set it to Published
- Go to the timeline and create a note with your attached file
Allow anonymous registrations means that anyone can register for your event, in other words they don’t have to be an existing customer and won’t need to sign into your portal in order to register.
The Portal Payment gateway field is a bit of a red herring as Dynamics 365 for Marketing doesn’t yet support payment gateways. This integration could be done with some custom development or, possibly, a third-party solution.
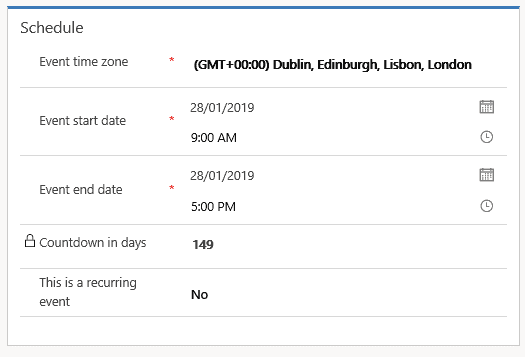
Schedule Section
If you are planning to run a series of events you can set the event to be a recurring event. In which case you will see the recurring scheduling options.
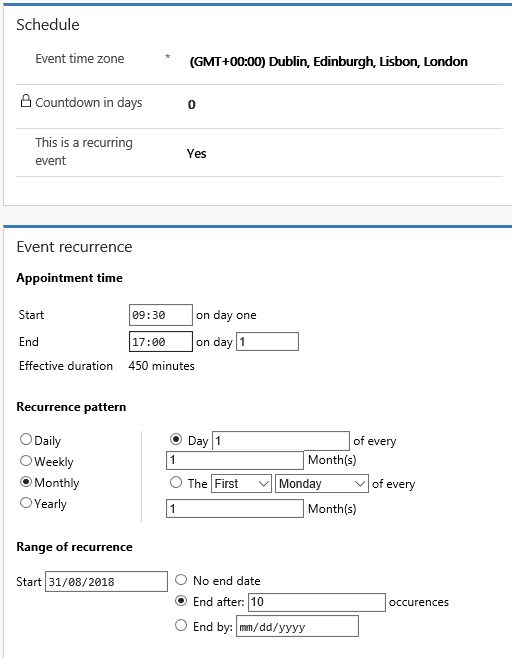
If you are not scheduling a recurring event just set the flag to No and set the date and time of your event.
Location Section
Next, select your event venue. You can select a venue, a room and a room layout.
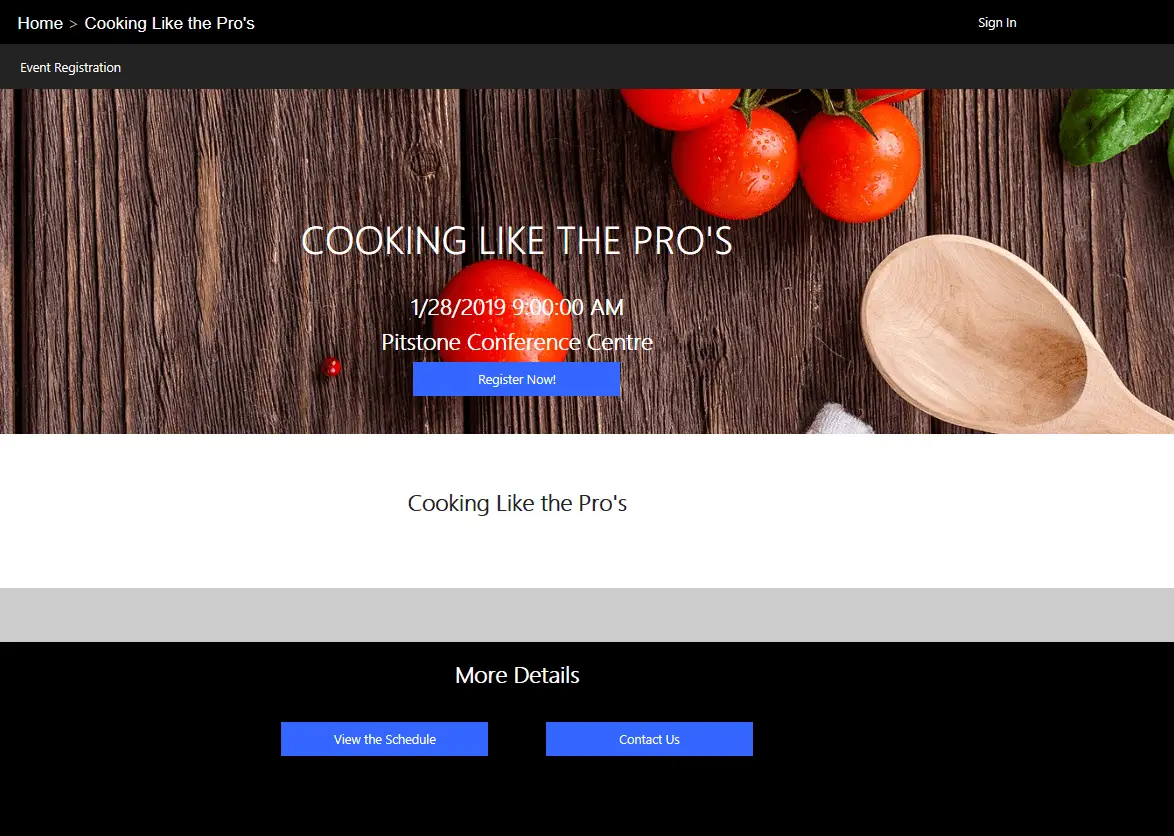
A venue is a virtual concept made up of a building and a room. Each of these three items can constrain how many people can attend your event. For example, I have chosen Pitstone Conference Centre (which has a capacity of 200), I then selected the Koffman room (which can hold 50 people), finally I selected the theatre style layout which can only accommodate 30 people.

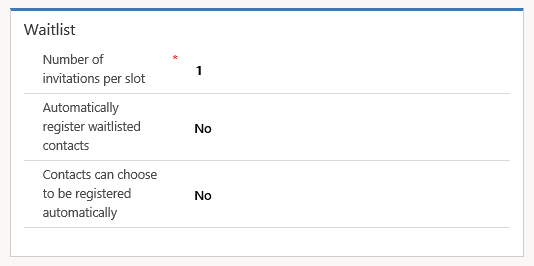
Waitlist Section
Are you expecting your event to be so popular that it oversubscribes? If the answer is “yes” then maybe you should take advantage of the waitlist functionality. Once the capacity has been reached the next person trying to register for your event will be told they are signing up to a waitlist. Once a place becomes available then an email can be configured to send an invite to the first person on the list. You can give them x amount of time to respond before you send an email to the next one. Alternatively, you can set the option to auto-register the waitlist people as places become available.
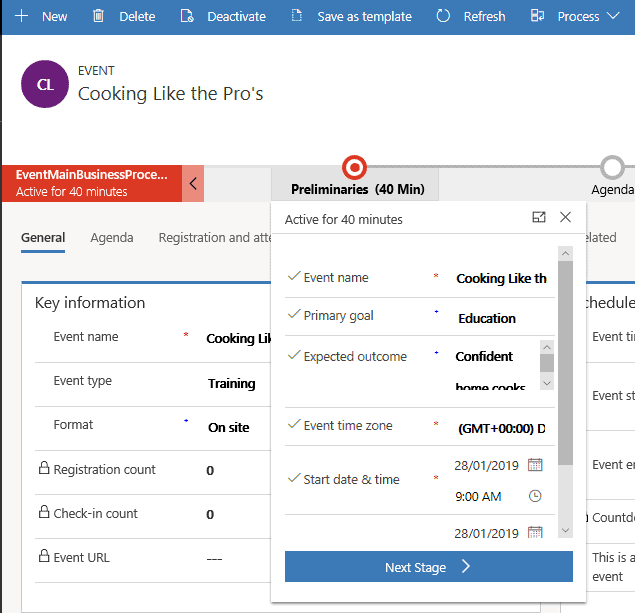
That concludes the first tab of your event, except for the process bar that runs along the top of the form. The idea is that it can help you to ensure you have completed everything in the right order as you develop your event. Process bars in Microsoft Dynamics have been around for a long time and are a useful way to guide users through a process. Most people who have seen Microsoft Dynamics before will be familiar with the process bar.
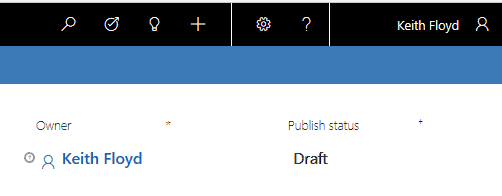
Currently your event is in Draft status and is not displayed on the event portal.
Once you change the publish status field to “Live” your event is published to the event portal.
You will see that the URL field is now populated. And you can browse to your event on the portal by clicking the globe button.
![]()
What you are now looking at is the out of the box portal layout. In terms of design and making it fit your corporate identity, all the pages are configurable so you could ask your dev team to “skin” the pages to look the way you want them.
Of course, we are not finished with creating our event yet, we still have to set up our sessions, passes, speakers and sponsors, which we will do in the next posts.
But, for now, I will unpublish my event and in the next blog post, we will start to add the remaining components that make up an event. View the second post in this series of Creating events in Dynamics 365 for Marketing. Or jump to part 3; Creating Events in Dynamics 365 Part 3.
At Rocket CRM we love Microsoft Dynamics! It’s all we do and we like to think we’ve got pretty good at it over the years. If you want to chat about how Dynamics 365 can help with your CRM project then please get in contact with us. We are more than happy to get on a call and help you with your problem.
ABOUT ROCKET CRM
Rocket CRM is a Microsoft Dynamics 365, and a platinum Click accredited partner, helping small to medium-sized businesses and charities harness the power of scalable CRM technology. Our mission is to make powerful CRM software simple with custom-built, user-focused solutions.
Website: rocketcrm.co.uk
Podcast: RocketPod
Social: LinkedIn